

Introduction
Baking is an art, and rising recipes are the foundation of some of the most beloved baked goods. From fluffy bread to self-rising flour delicacies, knowing how to handle rising is essential for delicious results. In this article, we’ll break down the secrets of rising recipes step by step. Whether you’re baking bread from scratch or exploring salt-rising bread, we’ve got you covered.
Table of Contents
Understanding Rising Recipes
What Are Rising Recipes?
Rising recipes involve baking techniques where dough or batter expands due to gases produced by yeast, baking soda, or baking powder. This process creates airy textures in bread, cakes, and pastries.
Why Rising Is Essential in Baking?
The rising process impacts the structure, flavor, and texture of baked goods. A well-risen recipe guarantees fluffy bread and cakes that melt in your mouth.
Learn more about the science behind baking on Enriched Recipes.
For more ideas, check out:
- Learn more about the baking science here: Discover the basics of baking techniques.
- Looking for inspiration? Try classic bread recipes.
- Read more about the role of yeast in baking from King Arthur Baking.
- Discover tips for perfect bread on The Kitchn.
Ingredients That Affect Rising in Recipes
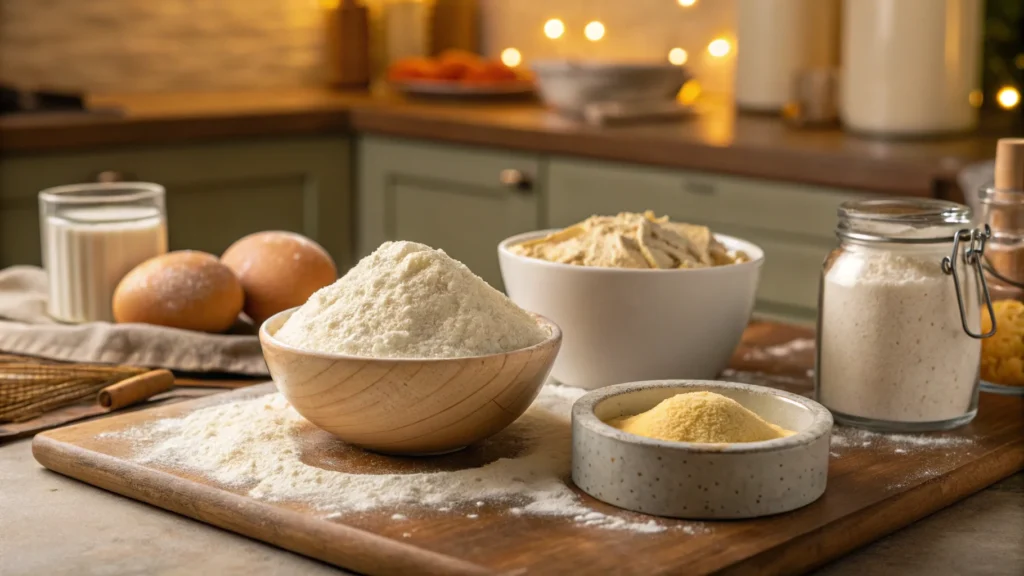
Key Ingredients for Proper Rising
When it comes to mastering rising recipes, the ingredients you choose play a crucial role. Here’s a breakdown of the key components:
- Yeast: A live organism that ferments sugars, creating carbon dioxide gas, which makes the dough rise.
- Baking Soda and Baking Powder: These chemical leaveners release gases when mixed with acids and liquids, ensuring a quick rise.
- Gluten: Found in wheat flour, gluten creates the elasticity and strength needed to trap gases during the rising process.
- Liquids: Water, milk, or other liquids activate yeast and hydrate the flour for proper structure.
- Sugar and Salt: Sugar feeds the yeast for fermentation, while salt strengthens the gluten network, balancing the rise.
The Role of Yeast, Baking Soda, and Baking Powder
Each leavening agent works differently:
- Yeast: Ideal for recipes requiring long proofing times, such as bread and rolls. It creates complex flavors through fermentation.
- Baking Soda: Perfect for recipes with acidic ingredients like buttermilk or lemon juice. It works instantly, making it ideal for quick breads and cakes.
- Baking Powder: A double-acting leavener that produces gases at two stages: when mixed with liquid and during baking. This ensures a consistent rise.
Pro Tip: For beginners, use recipes that combine self-rising flour and baking powder for foolproof results.
For more ideas, check out:
- Discover great ideas like perfect yeast bread recipes.
- Check out baking with gluten-free flours.
- Learn more about baking soda vs. baking powder on Serious Eats.
- Get tips for using yeast from Red Star Yeast.
Tips for Making Rising Recipes Easy
Essential Tools and Equipment
To simplify your journey with rising recipes, having the right tools is key. Here’s what you’ll need:
- Mixing Bowls: Use large, non-reactive bowls for mixing and proofing your dough.
- Dough Scraper: Ideal for handling sticky dough and dividing it into portions.
- Kitchen Scale: For accurate measurements of ingredients, ensuring consistent results.
- Proofing Basket (Banneton): Helps shape the dough while giving it a professional texture.
- Thermometer: Ensures liquids are at the right temperature for activating yeast (usually 105-110°F).
- Stand Mixer: Makes kneading easier and faster, especially for tougher doughs.
Common Mistakes and How to Avoid Them
Many home bakers face challenges with rising recipes. Here are some common mistakes and tips to fix them:
- Using Old Yeast: Always check the expiration date. Activate dry yeast in warm water with sugar to ensure it’s alive.
- Skipping the Proofing Time: Proofing allows flavors to develop and ensures proper rise. Be patient and let the dough double in size.
- Incorrect Temperatures: Too hot or cold environments can kill the yeast or slow down fermentation. Keep the proofing area warm but not too hot (75-80°F).
- Overproofing Dough: Overproofing weakens the gluten structure, leading to a collapsed bake. Follow the recipe’s proofing times closely.
- Improper Measurements: Baking is a science. Use a kitchen scale for precise ingredient ratios to avoid dense or overly airy results.
For more ideas, check out:
- Don’t miss our baking troubleshooting guide.
- Learn more about choosing baking tools.
- Explore pro tips for proofing dough from Taste of Home.
- Find out more about bread-making essentials at AllRecipes.
How to Make Rising Recipes Bread
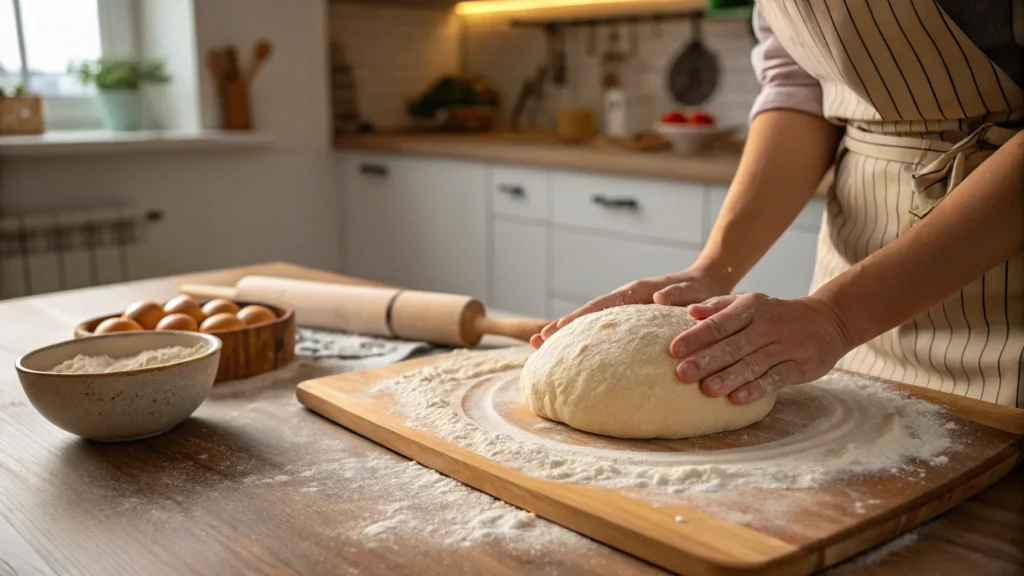
Step-by-Step Guide to Rising Bread Recipes
Making bread from rising recipes is both rewarding and simple when you follow these steps:
- Prepare the Ingredients: Combine flour, yeast, sugar, and salt in a large bowl. Slowly add lukewarm water or milk and mix until a shaggy dough forms.
- Knead the Dough: Transfer the dough to a floured surface and knead for 8-10 minutes, or until it becomes smooth and elastic. A stand mixer with a dough hook can save time.
- First Proofing: Place the dough in a greased bowl, cover with a damp towel or plastic wrap, and let it rise in a warm place until it doubles in size (about 1-2 hours).
- Shape the Dough: After proofing, punch down the dough to release air. Shape it into your desired loaf or roll shapes and transfer it to a prepared pan.
- Second Proofing: Allow the shaped dough to rise again until it doubles in size (30-45 minutes). This step ensures a soft, airy texture.
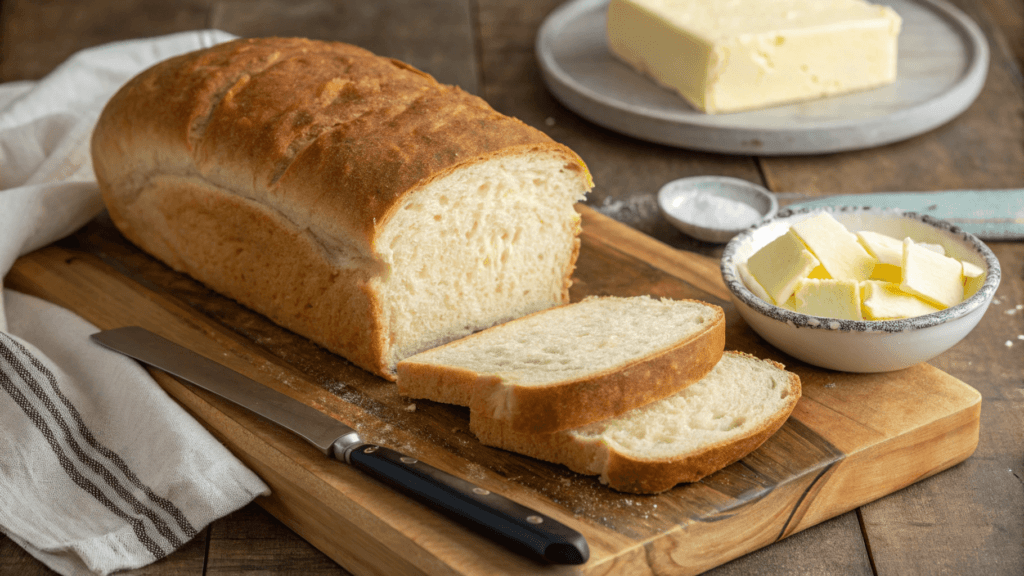
- Bake: Preheat the oven to 375°F. Bake the bread for 25-30 minutes or until the crust is golden brown and the loaf sounds hollow when tapped.
- Cool and Enjoy: Let the bread cool completely before slicing to maintain its structure.
Top Tips for Perfect Bread Rising Every Time
- Warm Environment: Proof dough in a slightly warm oven (turned off) or near a sunny window for consistent results.
- Avoid Overworking the Dough: Over-kneading can make bread dense. Stop kneading when the dough passes the “windowpane test.”
- Steam for Crust: Place a pan of hot water in the oven during baking to create a crusty finish.
For more ideas, check out:
- Looking for inspiration? Try easy bread recipes for beginners.
- Check out tips for perfecting sourdough bread.
- Find more bread-baking tips at The Spruce Eats.
- Explore advanced bread-making techniques from Breadtopia.
How to Use a Bread Machine for Rising Recipes
Benefits of Using a Bread Machine
A bread machine is a game-changer for anyone looking to simplify rising recipes. Here’s why:
- Time-Saving: The bread machine handles kneading, proofing, and baking, saving you hours of work.
- Consistent Results: With precise temperature and kneading control, bread machines ensure consistent dough rising and texture.
- Hands-Off Convenience: You can add your ingredients, press a button, and let the machine do the rest.
- Versatility: Most bread machines come with settings for white bread, whole grain, dough-only cycles, and even specialty recipes like salt-rising bread.
Step-by-Step Bread Machine Guide
Using a bread machine for rising recipes is easy when you follow these steps:
- Layer Ingredients Correctly: Add liquids (water, milk, eggs) first, then dry ingredients (flour, sugar, salt), and finally yeast. This prevents yeast from activating prematurely.
- Select the Right Setting: Choose the appropriate program for your recipe. For example, use the “dough” setting if you plan to bake in a conventional oven.
- Check the Dough Consistency: After a few minutes of kneading, open the lid and check the dough. It should form a smooth ball. If it’s too dry, add a teaspoon of water. If too wet, sprinkle some flour.
- Let It Work: Once the program completes, remove the dough or baked bread immediately to prevent sogginess.
Pro Tip: For a more artisan look, use the bread machine for dough prep, then shape and bake it in your oven for better crust texture.
For more ideas, check out
- Discover great ideas like choosing the best bread machine recipes.
- Learn more about bread machine troubleshooting.
- Explore bread machine recipes on King Arthur Baking.
- Learn how to use your bread machine effectively at Bob’s Red Mill.
Exploring Salt Rising Bread Recipes
Salt-Rising Bread Recipe with Potatoes
Adding potatoes to salt-rising bread enhances its texture and flavor.
Ingredients:
- 2 medium potatoes (peeled and grated)
- 1 cup scalded milk
- 1 tablespoon sugar
- 1/2 teaspoon baking soda
- Flour as needed
Instructions:
- Replace the cornmeal in the starter with grated potatoes. Follow the same process to prepare the starter and dough.
- The potato starch contributes to a softer, fluffier crumb.
Pro Tip: Maintain a consistent warm temperature for the starter to ensure proper fermentation.
For more ideas, check out:
- Learn more about traditional bread-making techniques.
- Check out unique bread recipes.
- Read more about the history of salt-rising bread on Smithsonian Magazine.
- Discover additional salt-rising bread variations at Epicurious.
Self-Rising Flour Recipes
What Is Self-Rising Flour?
Self-rising flour is a convenient baking ingredient that combines all-purpose flour, baking powder, and salt. It simplifies the preparation of baked goods by eliminating the need to measure these components separately.
Common Uses for Self-Rising Flour:
- Pancakes and waffles
- Biscuits
- Muffins
- Quick breads
Pro Tip: If you don’t have self-rising flour on hand, make your own by combining:
- 1 cup all-purpose flour
- 1 1/2 teaspoons baking powder
- 1/4 teaspoon salt
Easy Recipes Using Self-Rising Flour
Self-rising flour is perfect for quick and easy baking. Here are two popular recipes:
1. Classic Buttermilk Biscuits
- Ingredients:
- 2 cups self-rising flour
- 1/2 cup cold butter (cubed)
- 3/4 cup buttermilk
- Instructions:
- Preheat oven to 425°F.
- In a bowl, cut the butter into the self-rising flour until it resembles coarse crumbs.
- Stir in buttermilk until a soft dough forms.
- Roll out dough and cut into circles.
- Bake for 12-15 minutes or until golden brown.
2. Easy Banana Bread
- Ingredients:
- 1 1/2 cups self-rising flour
- 3 ripe bananas (mashed)
- 1/2 cup sugar
- 1/3 cup melted butter
- Instructions:
- Preheat oven to 350°F.
- Mix all ingredients in a large bowl until well combined.
- Pour batter into a greased loaf pan.
- Bake for 45-50 minutes or until a toothpick comes out clean.
For more ideas, check out:
- Check out quick bread recipes using self-rising flour.
- Learn more about time-saving baking tips.
- Explore self-rising flour recipes at Betty Crocker.
- Learn how to use self-rising flour with tips from Delish.
Rising Recipe FAQs
How to Make Rising Recipes Easy?
To make rising recipes easy, focus on these tips:
- Use self-rising flour for quick recipes that don’t require yeast or long proofing times.
- Choose a warm, draft-free spot for proofing dough, such as a slightly warm oven or near a window.
- Always measure your ingredients accurately using a kitchen scale for consistent results.
For step-by-step guides, check out baking made easy.
Salt Rising Bread Recipe Original
Salt-rising bread requires a fermented starter made from cornmeal or potatoes. The original recipe uses a combination of scalded milk, sugar, and cornmeal left to ferment overnight. Once the starter is ready, you mix it into a dough, allow it to proof, and bake as instructed.
For a detailed recipe, read traditional bread techniques.
Self-Rising Flour Recipe
You can easily make self-rising flour at home by mixing:
- 1 cup all-purpose flour
- 1 1/2 teaspoons baking powder
- 1/4 teaspoon salt
This substitute works well for biscuits, pancakes, and quick breads, saving you a trip to the store.
Discover more about DIY baking ingredients.
Salt-Rising Bread Recipe Potato
A variation of salt-rising bread uses grated potatoes in the starter. This method creates a softer texture and adds a subtle flavor. Simply replace cornmeal in the starter with grated potatoes and follow the original recipe steps.
Learn more about unique bread recipes at Epicurious.
Easy Recipes Using Self-Rising Flour
Self-rising flour opens up endless possibilities for quick and easy recipes. From fluffy pancakes to tender biscuits, you can whip up delicious baked goods in no time. Try pairing self-rising flour with your favorite fruits, like bananas or blueberries, for an extra burst of flavor.
For more ideas, check out self-rising flour recipes.
- Don’t miss our salt-rising bread guide.
- Looking for inspiration? Try baking with unique flours.
- Explore more salt-rising bread recipes on Taste of Home.
- Learn about self-rising flour baking tips from The Kitchn.
Expert Tips for Perfect Rising Recipes
Understanding Proofing and Rest Times (h3)
Proofing and resting are crucial for perfect rising recipes. These processes allow the dough to develop flavor, structure, and airiness.
- First Proofing (Bulk Fermentation): After kneading, the dough is left to rise for 1-2 hours. During this time, yeast ferments sugars and produces carbon dioxide, which expands the dough.
- Second Proofing (Final Rise): After shaping, the dough rests again before baking. This ensures it rises properly in the oven.
- Resting Non-Yeast Doughs: For recipes using baking powder or soda, a short rest allows the ingredients to hydrate and activate before baking.
Pro Tip: Cover the dough with a damp cloth during proofing to prevent it from drying out.
Common Problems in Rising and How to Fix Them
Even experienced bakers encounter rising issues. Here’s how to troubleshoot:
- Dough Not Rising:
- Cause: Yeast is expired, water is too hot/cold, or the environment is too cold.
- Solution: Test yeast before using, ensure water is 105-110°F, and proof dough in a warm spot.
- Dough Rising Too Much:
- Cause: Overproofing or excessive yeast.
- Solution: Follow proofing times closely and use the recommended amount of yeast.
- Dense Baked Goods:
- Cause: Not enough kneading, too much flour, or skipping proofing time.
- Solution: Knead until the dough is elastic, measure ingredients precisely, and allow adequate proofing time.
- Collapsing During Baking:
- Cause: Overproofed dough or oven not preheated.
- Solution: Avoid overproofing and ensure your oven is fully preheated before baking.
- Learn more about troubleshooting common baking problems.
- Check out our guide to proofing dough.
- Explore proofing techniques from Bon Appétit.
- Find troubleshooting tips on The Bread Guide.
Conclusion and Final Thoughts
The Joy of Mastering Rising Recipes
Mastering rising recipes opens up a world of delicious possibilities, from fluffy breads and rolls to quick recipes using self-rising flour. With the right techniques, ingredients, and tools, you can elevate your baking game and create bakery-quality goods right at home.
Whether you’re experimenting with salt-rising bread or trying your hand at homemade biscuits, patience and attention to detail are key. Proofing, kneading, and selecting quality ingredients all contribute to the final result. The beauty of baking is that every recipe teaches you something new, making each loaf or batch more rewarding than the last.
Where to Go Next for Baking Inspiration?
Your baking journey doesn’t have to end here. Continue experimenting with rising recipes and learn about more advanced techniques like sourdough starters, enriched doughs, and gluten-free baking. Dive into the unique world of fermented bread recipes or explore the versatility of self-rising flour in sweet and savory dishes.
For more inspiration, don’t miss our detailed guides on bread-making and quick baking techniques:
- Check out our ultimate sourdough guide.
- Discover quick baking tips for busy days.
- Explore classic bread recipes.
- Don’t miss our baking inspiration hub.
- Find advanced techniques on The Perfect Loaf.
- Learn more baking secrets from Serious Eats.