

Introduction:
Why I Love Making Instant Pot Greek Yogurt
As someone who adores cooking and finding healthier alternatives to store-bought products, discovering the process of making Greek yogurt in an Instant Pot was a game-changer. Not only is it simple and cost-effective, but the results are consistently creamy and delicious. Whether you’re a yogurt enthusiast or new to homemade recipes, this guide will show you how to create the perfect Greek yogurt every time. Let’s dive in!
Table of Contents
What Makes Instant Pot Greek Yogurt Special?
- Why Choose Greek Yogurt?
Greek yogurt stands out for its creamy texture, tangy taste, and impressive nutritional profile. Unlike regular yogurt, Greek yogurt is strained to remove excess whey, resulting in a higher protein content and thicker consistency. It’s perfect for breakfast, snacks, or as an ingredient in recipes.- Health Benefits: Rich in probiotics, calcium, and essential amino acids.
- Cost-Effectiveness: Homemade yogurt costs significantly less than store-bought options.
- Why Use an Instant Pot for Yogurt?
The Instant Pot simplifies the yogurt-making process with its dedicated “Yogurt” setting, ensuring precise temperature control during fermentation. This consistency is key to achieving the perfect yogurt texture.- No need for constant monitoring.
- Reliable results every time!
👉 Discover great ideas like this: How to Use an Instant Pot for Beginners
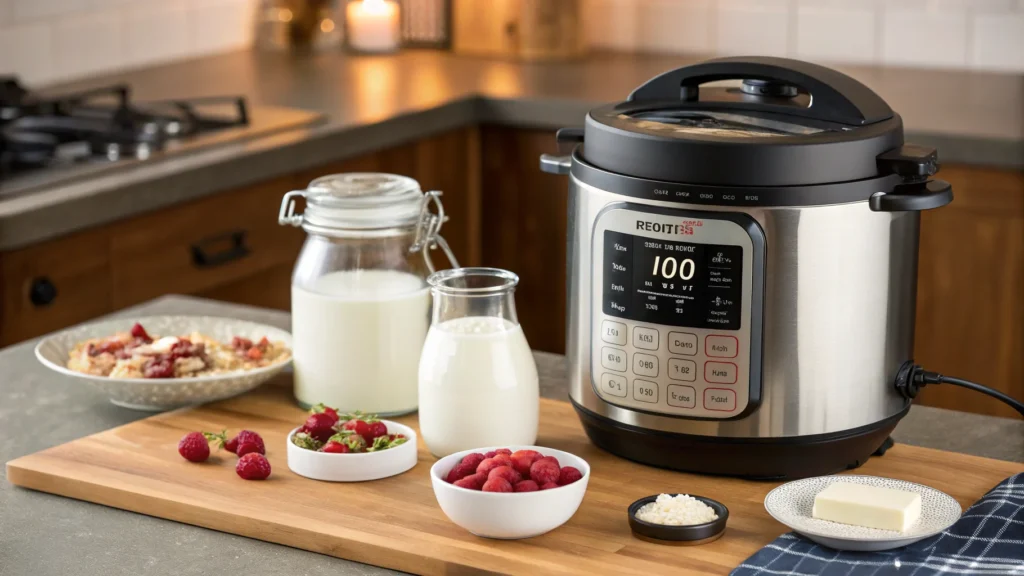
Tools and Ingredients You’ll Need
- Essential Equipment
Before starting, it’s important to have the right tools for making Instant Pot Greek yogurt. Here’s what you’ll need:- Instant Pot with a yogurt setting: Not all models have this feature, so double-check before starting.
- Thermometer: To monitor the milk’s temperature (essential for proper fermentation).
- Straining tools: Use a cheesecloth, fine mesh strainer, or nut milk bag to strain the yogurt for that thick Greek-style consistency.
- Glass or stainless-steel bowls: To store the strained yogurt.
- Key Ingredients
Making Greek yogurt at home requires just two simple ingredients, but their quality will directly impact the results.- Milk: Whole milk is ideal for creamy, rich yogurt, but you can also use low-fat, almond, or soy milk for specific dietary needs. If using plant-based milk, ensure it’s unsweetened and suitable for fermentation.
- Greek yogurt starter: You’ll need 2-3 tablespoons of plain Greek yogurt with live and active cultures as a starter. The cultures help ferment the milk, turning it into yogurt.
- Pro Tip: Look for yogurt labeled with “live and active cultures” for the best results.
- Optional Add-Ins
You can customize your yogurt by adding ingredients after fermentation:- Sweeteners: Honey, maple syrup, or agave.
- Flavors: Vanilla extract, cinnamon, or fresh fruit.
👉 Learn more about yogurt variations: Healthy Yogurt Recipes to Try.
Step-by-Step Guide to Making Instant Pot Greek Yogurt

Making Greek yogurt in an Instant Pot is surprisingly simple, especially if you follow these step-by-step instructions. Here’s how to do it:
Step 1: Prepping the Milk
- Scald the Milk: Pour your milk (1 gallon for a large batch) into the Instant Pot and press the “Saute” button. Heat the milk to 180°F, stirring occasionally to prevent burning.
- Why? Scalding helps kill any unwanted bacteria and changes the proteins, allowing the milk to set better into yogurt.
- Cool the Milk: After scalding, turn off the Instant Pot and remove the inner pot. Let the milk cool to 110°F. Use a thermometer to check the temperature.
- Pro Tip: Speed up the cooling process by placing the pot in a sink filled with cold water.
- Scalding Milk Properly: For more details on why scalding milk is essential for yogurt-making, check out this guide: Why Scald Milk for Yogurt?.
Step 2: Adding the Yogurt Starter
- Take 2-3 tablespoons of Greek yogurt (your starter) and mix it with a small amount of cooled milk in a separate bowl. This ensures the starter blends smoothly.
- Gently whisk the starter mixture into the cooled milk. Avoid over-mixing to preserve the live cultures.
Step 3: Incubating in the Instant Pot
- Place the inner pot back into the Instant Pot and press the “Yogurt” button. Set the time for 8-10 hours, depending on your desired tanginess.
- For milder yogurt, stick with 8 hours. For tangier yogurt, go for 10 hours or more.
- Close the lid (no pressure is needed), and let the Instant Pot do its magic.
Step 4: Straining the Yogurt
- Once the yogurt is ready, pour it into a cheesecloth-lined strainer or nut milk bag. Place the strainer over a bowl to catch the whey.
- Allow it to strain for 2-4 hours in the refrigerator until it reaches your preferred consistency.
- Straining longer creates thicker yogurt.
- Save the whey! It’s great for smoothies or baking.
- Fixing Grainy Yogurt: To dive deeper into common yogurt-making issues, read this detailed troubleshooting guide: Yogurt Troubleshooting Tips.
Step 5: Storing Your Yogurt
- Transfer the strained yogurt into clean, airtight containers and refrigerate.
- Your homemade Greek yogurt will stay fresh for up to 7-10 days.
👉 Don’t miss our recipe for Greek Yogurt Toppings: Delicious Yogurt Additions.
Gut Health Benefits: Learn more about the science of probiotics and their role in gut health: Probiotics and Digestive Health.
Troubleshooting Common Issues
Even with the simplicity of making Instant Pot Greek yogurt, things don’t always go as planned. Here are some common problems and how to fix them:
Why Isn’t My Yogurt Setting?
- Inactive Yogurt Starter:
- Solution: Ensure your yogurt starter has live and active cultures. If the starter is too old or has been frozen, it may not work effectively.
- Temperature Issues:
- Solution: Double-check the milk’s cooling temperature before adding the starter. Milk should be 110°F—too hot will kill the cultures, while too cool will slow fermentation.
- Improper Instant Pot Setting:
- Solution: Make sure the Instant Pot is on the correct “Yogurt” mode and not “Keep Warm” or any other setting.
Fixing Grainy or Watery Yogurt
- Why Is My Yogurt Grainy?
- Cause: Overheating the milk or overmixing the yogurt starter.
- Solution: Heat milk slowly and mix the starter gently to avoid breaking the protein structure.
- Why Is My Yogurt Watery?
- Cause: Inadequate fermentation or not straining enough.
- Solution: Let the yogurt ferment longer (10+ hours) or strain it for an extra hour to remove excess whey.
Preventing Tangy Overload
- Too Tangy?
- Cause: Over-fermentation.
- Solution: Reduce fermentation time to 6-8 hours for a milder flavor.
- Not Tangy Enough?
- Solution: Increase fermentation time to 10+ hours for a more robust tanginess.
Pro Tip: If all else fails, you can still repurpose imperfect yogurt! Use it in smoothies, marinades, or baked goods.
👉 Looking for inspiration? Try this yogurt smoothie guide: Healthy Smoothie Ideas.
Health Benefits of Homemade Greek Yogurt
Making Greek yogurt at home with an Instant Pot isn’t just about saving money—it’s also a powerhouse of health benefits. Here’s why this creamy delight is worth adding to your diet.
Packed with Nutrients
Greek yogurt is a nutritional superstar. Here’s what makes it stand out:
- High Protein Content: With nearly twice the protein of regular yogurt, it helps build and repair muscles, making it perfect for fitness enthusiasts.
- Rich in Calcium: Supports bone health and strengthens teeth.
- Probiotics for Gut Health: Greek yogurt contains beneficial bacteria that improve digestion, boost immunity, and maintain gut balance.
Customizable Ingredients for Specific Diets
When you make your own Greek yogurt, you control what goes into it.
- Low-Sugar Option: Unlike many store-bought yogurts, homemade Greek yogurt has no added sugars, making it perfect for low-carb or diabetic diets.
- Dairy-Free Alternatives: Use almond, coconut, or soy milk to create a dairy-free version while retaining the creamy texture.
- Keto-Friendly: Whole milk Greek yogurt fits well into a keto lifestyle when combined with low-carb toppings like nuts or chia seeds.
Great for Weight Management and More Energy
- Satiety Boost: The protein and creamy consistency keep you full longer, reducing unhealthy snacking.
- Energy Source: Packed with vitamins like B12, Greek yogurt helps convert food into energy.
👉 Discover more healthy breakfast ideas using Greek yogurt: Healthy Breakfast Recipes.
Top Tips for Perfect Instant Pot Greek Yogurt Every Time
Making Greek yogurt in an Instant Pot is straightforward, but a few insider tips can take your results from good to perfect. Let’s explore some essential tricks for the creamiest, most delicious yogurt ever.
Reusable Starter Cultures: Want to learn how to extend your starter’s life? Here’s a helpful guide: Yogurt Starter Tips.
Perfect Starter Culture Tips
- Choose the Right Yogurt Starter: Always use plain Greek yogurt with live and active cultures. Avoid flavored or sweetened varieties, as they may not ferment properly.
- Freshness Matters: Ensure the yogurt starter is fresh. If it’s been sitting in your fridge for weeks, it might not work as effectively.
- Freeze for Future Batches: Freeze small portions of your homemade yogurt in ice cube trays. Defrost and use these as starters for future batches.
Time and Temperature Tricks
- Longer Fermentation Equals Tangier Yogurt: If you enjoy tangy yogurt, set the Instant Pot for 10-12 hours. For a milder taste, stick to 8 hours.
- Consistency at 110°F: Always ensure your milk has cooled to 110°F before adding the starter. Too hot, and it will kill the cultures; too cold, and fermentation will be weak.
- Avoid Lid Mistakes: While fermenting, keep the Instant Pot’s lid loose or use a glass lid. This prevents condensation from dripping into the yogurt.
How to Experiment with Flavors
Homemade yogurt is incredibly versatile, and you can customize it easily:
- Vanilla or Cinnamon: Stir in a splash of vanilla extract or a dash of cinnamon after straining.
- Sweeteners: Add a drizzle of honey, maple syrup, or agave for a touch of sweetness.
- Fresh Fruit: Layer your yogurt with berries, mango, or bananas for a nutritious treat.
Pro Tip: Straining for the Perfect Consistency
- Use a nut milk bag or cheesecloth for straining to achieve the signature thickness of Greek yogurt.
- Strain for 2-4 hours depending on your desired consistency. Straining overnight can create yogurt so thick it resembles cream cheese!
Storage and Longevity
- Seal It Right: Store your yogurt in airtight containers to keep it fresh for up to 10 days.
- Save the Whey: The liquid whey strained from the yogurt can be used in smoothies, baking, or even soups.
👉 Check out other ways to use Greek yogurt in cooking: Creative Greek Yogurt Recipes.
Creative Ways to Use Greek Yogurt
Greek yogurt is one of the most versatile ingredients you can have in your kitchen. From savory dishes to sweet treats, it adds a creamy texture and a protein boost to a variety of recipes. Here are some of the best ways to enjoy your homemade Instant Pot Greek yogurt.
Cooking and Baking with Greek Yogurt
- As a Substitute:
- Replace sour cream, mayonnaise, or heavy cream with Greek yogurt for a lighter, healthier option in recipes.
- Use it in creamy soups, mashed potatoes, or dips for a velvety texture.
- Marinades and Sauces:
- Greek yogurt works beautifully as a base for marinades, especially for chicken or lamb. The natural acidity tenderizes the meat while adding a rich flavor.
- Make tzatziki sauce by mixing yogurt with cucumber, garlic, lemon juice, and dill.
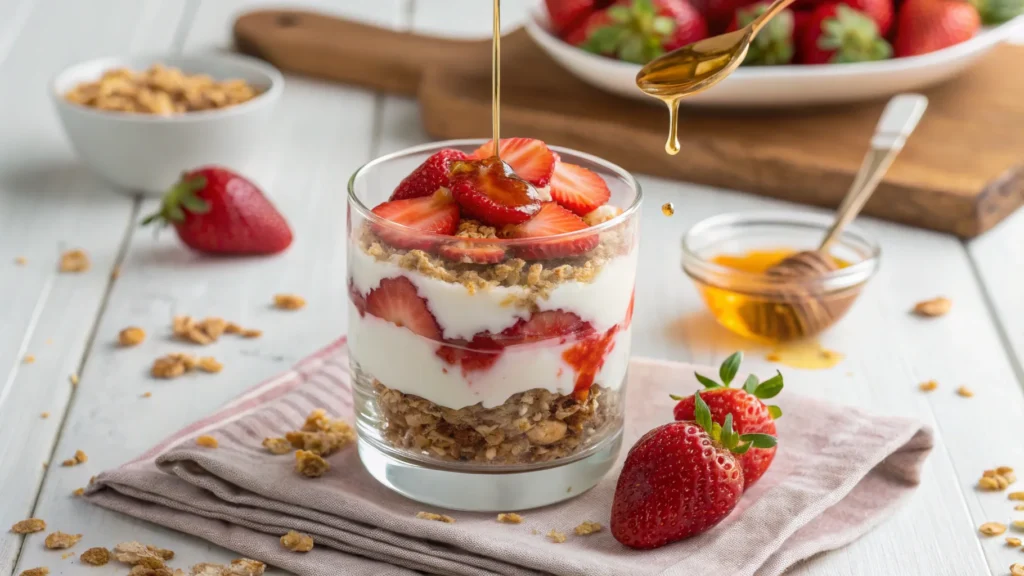
Yogurt as a Snack or Breakfast Option
- Classic Parfait:
- Layer Greek yogurt with granola, fresh fruit, and a drizzle of honey for a quick and healthy breakfast.
- Smoothies and Bowls:
- Blend yogurt with your favorite fruits, almond milk, and a handful of spinach for a nutrient-packed smoothie.
- Create smoothie bowls topped with nuts, seeds, and fresh fruit for a picture-perfect breakfast.
- Frozen Treats:
- Freeze your yogurt into popsicles or swirl it with fruit puree for a refreshing dessert.
Desserts Made with Greek Yogurt
- Baked Goods: Add yogurt to muffins, cakes, and pancakes for a moist, fluffy texture.
- Cheesecake Alternative: Make a no-bake cheesecake using Greek yogurt and cream cheese for a lighter twist.
👉 Discover more recipes like these: Easy Greek Yogurt Recipes.
FAQs About Instant Pot Greek Yogurt
Here are answers to some of the most commonly asked questions about making Greek yogurt in an Instant Pot to help you get the best results.
Why would you put yogurt in an Instant Pot?
The Instant Pot simplifies the yogurt-making process with its precise temperature control. Fermentation requires consistent warmth to activate the live cultures, and the Instant Pot’s “Yogurt” setting takes care of this automatically.
- No Guesswork: You don’t need to monitor the temperature manually or worry about keeping the milk warm.
- Better Consistency: The controlled environment ensures thick, creamy yogurt every time.
👉 Learn more about the benefits of using an Instant Pot here: Instant Pot Essentials.
How long is the yogurt setting on an Instant Pot?
The yogurt setting typically runs for 8-10 hours, depending on how tangy you like your yogurt.
- Shorter Time (6-8 hours): Produces a mild, creamy flavor.
- Longer Time (10-12 hours): Creates a tangier yogurt with a more pronounced flavor.
Pro Tip: You can experiment with fermentation times to find your ideal taste and texture.
Can I use Greek yogurt as a yogurt starter?
Yes, using store-bought plain Greek yogurt with live and active cultures is a great way to start your yogurt.
- How to Use It: Add 2-3 tablespoons of the yogurt to your cooled milk and mix gently.
- Reusable Starter: Once you’ve made your homemade yogurt, you can use it as a starter for the next batch, up to 3-5 times.
Is it better to make yogurt for 24 hours or 8 hours in an Instant Pot?
The choice depends on your flavor and probiotic preferences:
- 8 Hours: Provides a mild, less tangy yogurt with balanced probiotics.
- 24 Hours: Produces a much tangier yogurt with higher probiotic content, as the longer fermentation enhances the growth of beneficial bacteria.
If you have any other questions about making yogurt, don’t hesitate to ask. Homemade yogurt is all about experimenting and finding what works for you!
👉 Check out this yogurt troubleshooting guide: Common Yogurt Problems and Fixes.
External Resources and Expert Tips
Making Instant Pot Greek yogurt is a fun and rewarding process, but learning from experts and exploring additional resources can enhance your yogurt-making experience. Here are some valuable insights and references to guide you.
How to Use Leftover Whey: Explore these creative ideas for using whey in your kitchen: Creative Ways to Use Whey.
Expert Advice for Yogurt-Making Success
- Temperature is Key:
- Always scald your milk to 180°F to kill any unwanted bacteria and help the proteins in the milk coagulate properly. Cooling it to 110°F ensures the live cultures thrive during fermentation.
- Expert Tip: Use a kitchen thermometer to guarantee precise temperatures.
- Be Patient:
- Yogurt-making takes time, and rushing the process can affect the texture and flavor. Allow at least 8-10 hours for proper fermentation.
- Store It Right:
- Use airtight glass jars for storage to keep your yogurt fresh and prevent contamination.
Discover More Recipes for Yogurt Lovers
Here are some helpful external resources for inspiration and ideas:
- How to Use Leftover Whey: Find creative ways to use the whey you strain from your yogurt. Learn more here.
- Mastering Fermentation: Dive deeper into the art of fermentation with this detailed guide. Explore it here.
- Yogurt in Cooking: Discover how to incorporate yogurt into savory dishes like curries and soups. Check out these recipes.
Why Homemade Yogurt Is Worth It
Making yogurt at home gives you complete control over the process, ingredients, and flavor. With a little experimentation, you can customize your yogurt to match your taste preferences while enjoying its numerous health benefits.
Conclusion – Why Homemade Greek Yogurt Is Worth It
Making Greek yogurt in an Instant Pot isn’t just about creating a delicious treat—it’s about taking control of your food. By preparing yogurt at home, you get to decide the quality of ingredients, avoid unnecessary additives, and enjoy a product tailored to your taste preferences.
Key Benefits of Homemade Greek Yogurt
- Cost-Effective: A gallon of milk costs far less than multiple containers of store-bought yogurt, saving you money in the long run.
- Healthier Option: Homemade yogurt is free from preservatives, excess sugars, and artificial flavors often found in commercial brands.
- Customizable Flavors: Whether you like it tangy or mild, plain or flavored, you’re in charge of every detail.
The Instant Pot Advantage
The Instant Pot takes the guesswork out of yogurt-making. Its precise temperature control ensures consistent results every time. Plus, the convenience of having a hands-free process allows you to focus on other tasks while your yogurt ferments.
Final Thoughts
Whether you’re a seasoned cook or new to the kitchen, homemade Greek yogurt is a rewarding project. The process is simple, the results are satisfying, and the health benefits are undeniable. So, grab your Instant Pot, some milk, and a good yogurt starter—your creamy, tangy yogurt journey awaits!
👉 Learn more about healthy cooking techniques here: Healthy Kitchen Hacks.

Salt and Vinegar Wing Recipe – A Tangy Twist You’ll Love
When it comes to flavorful chicken wing recipes, salt and vinegar wings stand out as a timeless classic. With their perfect balance of tanginess and saltiness, these wings are a crowd-pleaser for game nights, barbecues, or any casual gathering. I’ve spent years experimenting with different wing recipes, but this one always wins hearts. Let’s dive into how you can make crispy, juicy, and tangy wings that pack a punch!