

Introduction
When it comes to flavorful chicken wing recipes, salt and vinegar wings stand out as a timeless classic. With their perfect balance of tanginess and saltiness, these wings are a crowd-pleaser for game nights, barbecues, or any casual gathering. I’ve spent years experimenting with different wing recipes, but this one always wins hearts. Let’s dive into how you can make crispy, juicy, and tangy wings that pack a punch!
Discover great ideas like these for chicken recipes!
Table of Contents
Understanding Salt and Vinegar Flavor
The Science of Salt and Vinegar
Salt and vinegar are a power duo when it comes to enhancing the flavor of chicken wings. Salt plays a critical role in bringing out the natural taste of chicken by amplifying its savory notes. It also helps to draw moisture to the surface, contributing to that perfect crispy skin when cooked. Meanwhile, vinegar adds acidity, which balances the richness of the chicken. Its tangy kick creates a mouthwatering contrast to the saltiness, making every bite irresistibly flavorful.
Vinegar isn’t just about taste—it also has a tenderizing effect. The mild acidity breaks down the protein structure of the chicken, resulting in juicy, tender wings. This process ensures that even after cooking, the meat retains moisture and doesn’t dry out. Together, salt and vinegar create a harmony of flavors and textures that make these wings so addictive.
Why Salt and Vinegar Wings Are So Popular
The love for salt and vinegar wings can be attributed to their nostalgic, universally appealing flavor. Inspired by the classic salt and vinegar chips, this recipe translates the tangy, salty taste into a savory snack perfect for any occasion. The unique combination of tanginess and saltiness caters to both adventurous eaters and fans of bold, uncomplicated flavors.
Salt and vinegar wings are especially popular at gatherings like game nights or backyard barbecues, where finger food reigns supreme. Their versatility and crowd-pleasing nature have solidified their place as a staple appetizer.
Learn more about pairing classic flavors like these.
Ingredients You’ll Need
Essential Ingredients
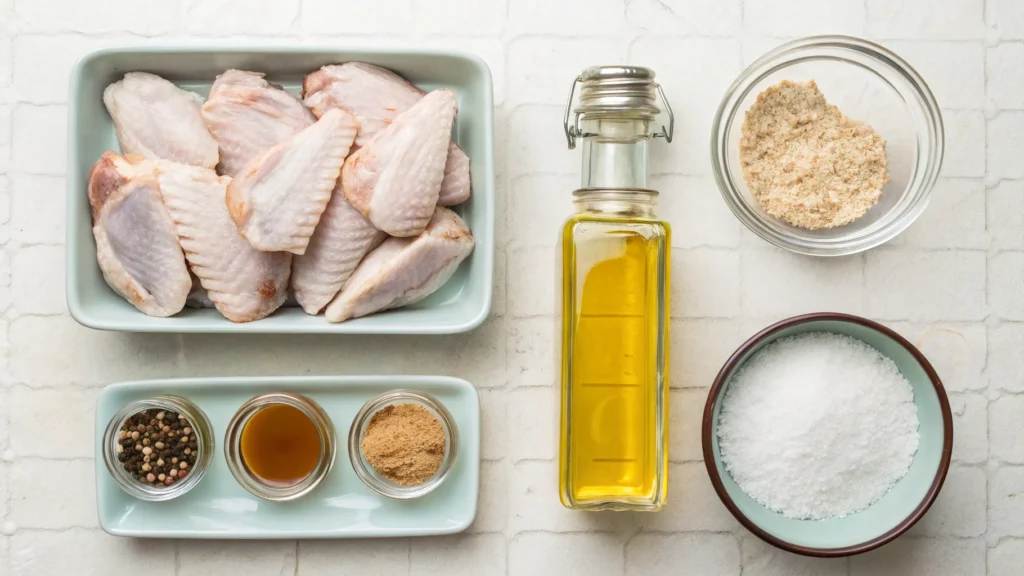
To make the perfect salt and vinegar wing recipe, you’ll need just a handful of key ingredients:
- Chicken Wings: Use fresh wings for the best flavor, but frozen wings work too—just make sure they’re fully thawed before cooking.
- White Vinegar: A pantry staple that gives the wings their signature tang. You can also use apple cider vinegar for a slightly sweeter flavor profile.
- Kosher Salt: This coarse salt is perfect for seasoning, as it adheres well to the wings and enhances the overall flavor. Regular table salt can be used, but the results may differ slightly.
Optional Add-Ins for Extra Flavor
While the basic recipe is delicious, adding a few spices can take your wings to the next level:
- Garlic Powder: Adds a subtle savory depth.
- Onion Powder: Complements the tanginess of the vinegar with mild sweetness.
- Smoked Paprika: Introduces a hint of smokiness for added complexity.
- Black Pepper: For a bit of heat to balance the salt and tang.
Pro Tip: If you love a bold punch of vinegar flavor, you can also use vinegar powder, available online or at specialty stores, to season the wings post-cooking.
Ingredient Tips
- When shopping for chicken wings, look for ones with an even thickness. They’ll cook more evenly, giving you perfectly crispy results.
- Avoid over-salting during preparation. Remember, you can always add more salt after cooking if needed.
Discover more seasoning ideas for chicken wings here!
Preparing the Chicken Wings
Cleaning and Trimming Chicken Wings
Proper preparation is key to ensuring your salt and vinegar wings come out crispy and flavorful. Start by cleaning the chicken wings thoroughly:
- Rinse the Wings: Wash the wings under cold running water to remove any residue or excess moisture from packaging.
- Trim Excess Fat: Use kitchen scissors to cut off any extra skin or fat for a cleaner, crispier cook.
- Separate Wingettes and Drumettes: If your wings are whole, use a sharp knife to cut at the joint, separating them into wingettes and drumettes. This makes them easier to cook and eat.
- Pat Dry: Use paper towels to pat the wings completely dry. Removing moisture ensures that the wings crisp up beautifully during cooking.
The Vinegar Soak Method
Soaking the wings in vinegar isn’t just a flavor booster—it’s a game-changer. Here’s how to do it:
- Prepare the Vinegar Solution: In a large mixing bowl, combine 1/4 cup of white vinegar, 1/4 cup of water, and a pinch of salt.
- Soak the Wings: Submerge the cleaned wings in the solution. Let them soak for 15-20 minutes. This process helps tenderize the meat while infusing a mild tangy flavor.
- Drain and Dry: Once soaked, drain the wings and pat them dry again. Excess moisture can prevent crispiness, so this step is crucial.
Why This Step Matters
- Tenderness: The vinegar softens the muscle fibers in the chicken, making the wings juicy and tender.
- Flavor Infusion: A quick soak ensures the salt and vinegar penetrate the meat without overpowering it.
- Crispy Skin: Drying the wings thoroughly after soaking is key to achieving that coveted crispy texture during cooking.
Pro Tip: For extra flavor, you can add a teaspoon of garlic powder or onion powder to the vinegar soak.
Don’t miss our other chicken preparation tips here!
Making Salt and Vinegar Seasoning
DIY Salt and Vinegar Seasoning Recipe
Creating your own salt and vinegar seasoning is quick and easy, and it ensures your wings are bursting with flavor. Here’s a simple recipe for homemade seasoning:
Ingredients:
- 2 tablespoons kosher salt
- 1 tablespoon vinegar powder (available at specialty stores or online)
- 1/2 teaspoon garlic powder (optional)
- 1/2 teaspoon onion powder (optional)
- 1/4 teaspoon smoked paprika (optional, for a smoky twist)
Instructions:
- Combine all the ingredients in a small bowl.
- Mix thoroughly until the seasoning is evenly distributed.
- Store the seasoning in an airtight container for future use.
This mixture is versatile and can be adjusted based on your taste preferences. If you prefer a tangier kick, increase the vinegar powder. For a richer flavor, add garlic or onion powder.
Store-Bought vs. Homemade Seasoning
If you’re short on time, store-bought salt and vinegar seasoning can be a convenient alternative. Many brands offer ready-made blends that are perfect for wings. However, making your own gives you control over the flavor intensity and ingredient quality. Plus, you can customize the seasoning to suit your taste buds.
When choosing a store-bought option, look for products that include real vinegar powder and minimal artificial additives for the best flavor.
Tips for Applying the Seasoning
- Sprinkle the seasoning onto the wings while they’re still hot. This helps the flavors stick better.
- For a more intense taste, coat the wings with a light layer of oil before sprinkling the seasoning.
Discover great tips for seasoning chicken here!
With your DIY seasoning ready, you’re now prepared to elevate your salt and vinegar wing recipe to new heights.
Cooking Methods for Perfect Wings

Oven-Baked Wings
Baking your salt and vinegar wings is a great option for achieving crispiness with less oil. Follow these steps:
- Preheat the Oven: Set your oven to 400°F (200°C).
- Prepare a Baking Tray: Line a baking sheet with aluminum foil and place a wire rack on top. This setup allows the heat to circulate around the wings for even cooking.
- Season and Arrange: Lightly oil the wings and season them with your salt and vinegar seasoning. Arrange them on the wire rack in a single layer.
- Bake: Bake for 40-45 minutes, flipping the wings halfway through. This ensures both sides become golden and crispy.
Pro Tip: For extra crispiness, broil the wings for 2-3 minutes at the end of the baking time.
Air-Fryer Salt and Vinegar Wings
The air fryer is a game-changer for cooking wings quickly and efficiently. It’s perfect for achieving restaurant-quality results at home.
- Preheat the Air Fryer: Set it to 375°F (190°C).
- Prepare the Wings: Pat the wings dry and season them generously with your seasoning blend.
- Cook in Batches: Place the wings in the air fryer basket in a single layer (avoid overcrowding). Cook for 20-25 minutes, flipping halfway through.
- Crisp it Up: Increase the temperature to 400°F (200°C) for the last 3-5 minutes to achieve maximum crispiness.
Pro Tip: Spritz the wings with a little cooking spray before air-frying for an extra crispy finish.
Learn more about air fryer techniques here!
Deep-Fried Goodness
For those who love the indulgence of classic fried wings, deep-frying is the way to go.
- Heat the Oil: Use a deep pot or fryer and heat vegetable oil to 375°F (190°C).
- Fry the Wings: Carefully lower the wings into the oil in small batches. Fry for 8-10 minutes until golden brown and crispy.
- Drain and Season: Remove the wings, place them on paper towels to drain excess oil, and sprinkle with salt and vinegar seasoning while hot.
Pro Tip: Avoid overcrowding the fryer, as it can lower the oil temperature and make the wings greasy.
Comparison of Methods
- Oven-Baked: Healthier with less oil, but requires more cooking time.
- Air-Fried: Quick, efficient, and yields crispy wings with minimal oil.
- Deep-Fried: The crispiest option but the most indulgent.
With these methods, you can customize your salt and vinegar wings to suit your preferences.
Serving Suggestions

Dips and Sides That Pair Perfectly
Salt and vinegar wings are delicious on their own, but pairing them with the right sides and dips takes the experience to another level. Here are some classic accompaniments:
- Dips:
- Ranch Dressing: Its creamy, herby flavor complements the tanginess of the wings.
- Blue Cheese Dip: Ideal for those who enjoy a bolder, richer pairing.
- Garlic Aioli: Adds a smooth, garlicky kick that contrasts perfectly with the vinegar notes.
- Sides:
- French Fries: Crispy, golden fries are a timeless sidekick for wings.
- Coleslaw: A refreshing, crunchy salad that balances the saltiness with its sweetness.
- Celery and Carrot Sticks: A healthy, crunchy addition that adds texture and freshness.
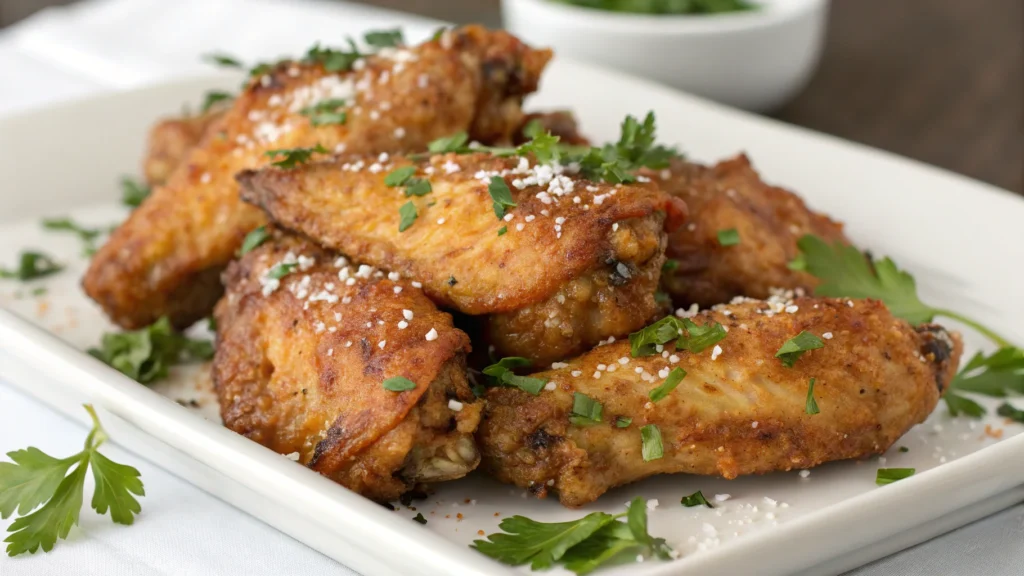
Presentation Tips
When serving your salt and vinegar wings, presentation matters—especially for parties or gatherings. Here are some easy ideas:
- Plating: Arrange the wings on a large serving platter, stacking them neatly for a feast-worthy display.
- Garnishes: Sprinkle fresh parsley or cilantro over the wings for a pop of color. Add lemon wedges on the side for those who enjoy an extra citrusy tang.
- Dips on the Side: Place the dips in small bowls around the platter for easy access.
Pro Tip: Serve the wings hot to preserve their crispy texture. A warming tray or heated serving dish can help maintain the perfect temperature during events.
With these serving suggestions, your salt and vinegar wings will be the star of any meal.
Looking for more serving ideas? Check these out!
Common Questions Answered (FAQ Section)
What Does Vinegar and Salt Do to Chicken?
Salt and vinegar serve both practical and flavorful purposes when cooking chicken. Salt draws out moisture from the skin, which helps achieve a crispy texture during cooking, while also enhancing the natural flavors of the chicken. On the other hand, vinegar tenderizes the meat by breaking down proteins, ensuring the chicken is juicy and flavorful. Together, they create a harmonious blend of tangy and savory notes that make dishes like salt and vinegar wings irresistible.
How to Make Your Own Salt and Vinegar Seasoning?
Making your own salt and vinegar seasoning is simple and allows you to adjust the flavor to your preference. Mix the following ingredients:
- 2 tablespoons of kosher salt
- 1 tablespoon of vinegar powder (available online or in specialty stores)
- Optional spices like garlic powder, onion powder, or smoked paprika for extra depth
Combine and store in an airtight container. This versatile seasoning works not only for wings but also on fries, popcorn, and roasted veggies.
Discover more about DIY seasonings here!
Why Do You Soak Chicken Wings in Vinegar?
Soaking chicken wings in vinegar serves multiple purposes:
- Tenderizing: Vinegar breaks down the muscle fibers, making the meat tender.
- Flavor Infusion: A short soak allows the tangy flavor to penetrate the meat.
- Removing Impurities: It cleanses the chicken and helps remove any residual odors.
For best results, soak the wings for 15-20 minutes and pat them dry before seasoning and cooking.
What Does Mixing Salt and Vinegar in a Glass of Water Do?
This mixture is often used as a home remedy for its potential health benefits. People believe that drinking salt and vinegar water in moderation may:
- Aid digestion
- Help replenish electrolytes after exercise
- Provide a quick energy boost
However, scientific evidence for these claims is limited, and this practice should be approached with caution.
By answering these common questions, you’ll feel more confident creating and serving your salt and vinegar wings with added knowledge about the key ingredients.
Pro Tips for Success
Ensuring Maximum Crispiness
Achieving perfectly crispy salt and vinegar wings requires some insider techniques. Here’s how to ensure every bite is crunchy and flavorful:
- Pat the Wings Dry: Moisture is the enemy of crispiness. After soaking or rinsing, thoroughly pat the wings dry with paper towels.
- Use Baking Powder: Toss the wings in a light coating of baking powder before seasoning. Baking powder raises the pH level of the skin, helping it crisp up in the oven or air fryer.
- Preheat Your Cooking Equipment: Whether you’re using an oven, air fryer, or deep fryer, make sure it’s preheated. Cooking in a hot environment allows the wings to crisp faster without drying out.
Avoiding Common Mistakes
While salt and vinegar wings are simple to make, some common missteps can impact the final result. Here’s what to watch out for:
- Over-Soaking in Vinegar: While soaking adds flavor, leaving the wings in vinegar for too long can make the meat overly tender or mushy. Stick to 15-20 minutes.
- Over-Salting: The seasoning already includes salt, so avoid adding extra salt during cooking. Taste and adjust after cooking if needed.
- Skipping the Resting Time: Allow your wings to rest for 2-3 minutes after cooking. This helps redistribute juices and ensures the wings stay crispy longer.
Tips for Even Flavor Distribution
- Toss Immediately: Toss the wings with seasoning as soon as they’re hot out of the oven or fryer. The heat helps the seasoning stick better.
- Double-Season for Bold Flavor: Add a light sprinkle of seasoning before cooking and finish with another layer right after cooking.
With these tips, your salt and vinegar wing recipe will consistently turn out restaurant-quality wings that your family and guests will rave about.
Looking for more pro cooking tips? Click here!
Storing and Reheating Wings
Proper Storage
If you’ve made a big batch of salt and vinegar wings or have leftovers, proper storage is essential to maintain their flavor and texture. Follow these steps:
- Refrigeration: Place cooled wings in an airtight container or wrap them tightly in aluminum foil or plastic wrap. They can be refrigerated for up to 3-4 days.
- Freezing: For longer storage, freeze the wings. Arrange them in a single layer on a baking sheet and freeze for 1-2 hours. Once frozen, transfer them to a freezer-safe bag or container. They’ll keep for up to 3 months.
- Label the Container: Always label the container with the date to keep track of how long they’ve been stored.
Reheating Tips
The key to reheating wings is to bring back their crispy exterior without overcooking the meat. Here are the best methods:
- Oven Reheating:
- Preheat your oven to 375°F (190°C).
- Place the wings on a wire rack over a baking sheet.
- Heat for 10-15 minutes, flipping halfway through.
- Air Fryer Reheating:
- Preheat the air fryer to 375°F (190°C).
- Arrange the wings in a single layer and reheat for 5-7 minutes until hot and crispy.
- Avoid the Microwave: While convenient, microwaving wings can make them soggy. Stick to the oven or air fryer for better results.
Pro Tip: Reviving Flavor
Before serving reheated wings, sprinkle them with a bit of your salt and vinegar seasoning to restore their bold, tangy flavor.
By properly storing and reheating, your wings will taste as good as they did when freshly cooked!
Discover more tips for food storage and reheating here!
Conclusion and Recipe Recap
Salt and vinegar wings are a timeless recipe that combines bold flavors and a crispy texture, making them a perfect choice for game nights, parties, or casual dinners. With just a few simple ingredients like chicken wings, vinegar, and salt, you can create a dish that’s both easy to prepare and incredibly satisfying.
The steps we’ve covered—cleaning and preparing the wings, soaking them in a vinegar solution, making your own salt and vinegar seasoning, and exploring various cooking methods—are all designed to help you nail this recipe every time. Whether you prefer oven-baking, air-frying, or deep-frying, each method ensures juicy, crispy wings with that signature tangy flavor.
For more inspiration, check out this comprehensive guide to chicken wing recipes by Serious Eats (external DoFollow link). It’s packed with ideas to help you customize your wing game!
Don’t forget to pair your wings with complementary dips like ranch or blue cheese and classic sides like fries or celery sticks for a complete meal. Learn more about creating the perfect sides with this BBQ Side Dish Guide from Food Network (external DoFollow link).
If you have leftovers, proper storage and reheating techniques will keep them fresh and flavorful. And the homemade salt and vinegar seasoning is a versatile addition to your spice cabinet for future dishes.
So, gather your ingredients, fire up your kitchen, and get ready to enjoy the ultimate salt and vinegar wing recipe. Your tastebuds—and your guests—will thank you!
Discover more great chicken dishes here!
Looking for more easy chicken recipes? Check them out here!

Strawberry Puree: The Best Recipes, Uses, and Tips
Strawberry puree has been my go-to ingredient for adding a burst of fresh, fruity flavor to countless recipes over the years. Whether you’re a dessert lover or a cocktail enthusiast, this versatile ingredient can transform simple dishes into something extraordinary. In this guide, I’ll walk you through everything you need to know about strawberry … Read more

Crispy Cottage Cheese Recipe for Air Fryer Baked Potato Skins (Healthy & Easy)
Cottage Cheese Recipe for Air Fryer Baked Potato Skins is the perfect combination of crispy, golden-brown potato skins and creamy, protein-rich cottage cheese. This recipe is a healthier take on a classic snack, giving you all the indulgent flavor without the guilt. Whether you’re looking for a quick appetizer, a party snack, or a … Read more